Connect pixie
Pixie is a cutting-edge observability platform designed to provide real-time insights into the performance and behavior of Kubernetes applications and microservices. Like its folklore namesake, Pixie grants an almost magical ability to uncover hidden insights and troubleshoot issues that may otherwise remain elusive within the vast and dynamic world of containerized applications.
Features
With Pixie, developers and operators gain the power to peer into the heart of their Kubernetes clusters, unveiling the interactions between services, the flow of data, and the behavior of applications in real time. This tool empowers them to swiftly identify performance bottlenecks, troubleshoot errors, and optimize resource allocation, ensuring that their Kubernetes ecosystem runs harmoniously and efficiently.
Overview
The process of integrating azure services in onepane requires the following:
- Getting pixie api key from cluster
- Getting pixie cluster id from cluster
- Get the stated keys and place it in onepane
Steps
here's a step-by-step guide on how to create an API key and Ingest license for getting newrelic datas into onepane. We are assuming that you are having a healthy kubernetes cluster.
Step 1: Get Kubernetes prerequisites ready
- Install kubectl
- Set the cluster in your current context
Step 2: Install pixie in a kuberentes cluster
- Open your web browser and navigate to the Pixie installation guide .
- Install pixie in the cluster by following the instructions
Step 3: Get cluster ID from cluster
Ensure the
plnamespace existsExecute the kubectl command for getting the secret
kubectl get secret/pl-cluster-secrets -n pl -o yaml
Get the value for cluster-id and do a base64 decode using the following command
echo <cluster-id> | base64 --decodeStore it in a safe place
Step 4: Get Deployment key from cluster
Ensure the
plnamespace existsExecute the kubectl command for getting the secret
kubectl get secret/pl-deploy-secrets -n pl -o yaml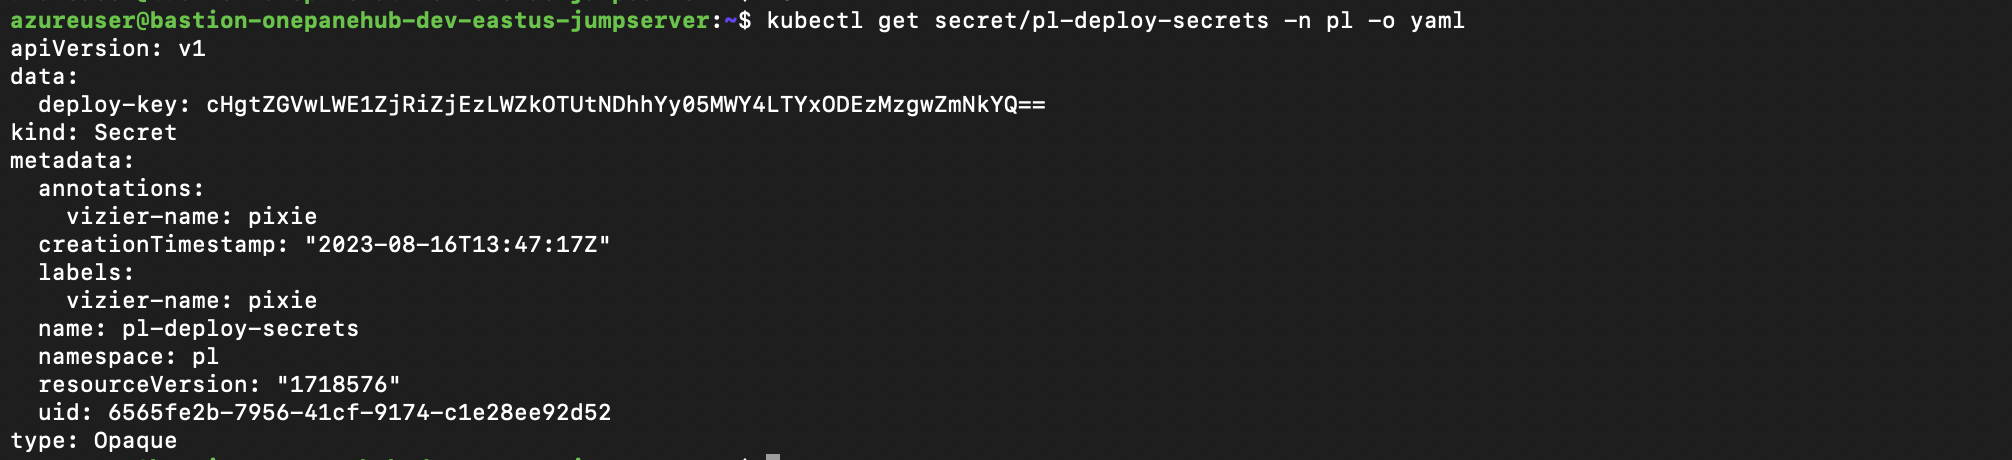
Get the value for deploy-key and do a base64 decode using the following command
echo <deploy-key> | base64 --decodeStore it in a safe place
Step 5: Get Pixie cloud address
Ensure the
plnamespace existsExecute the kubectl command for getting the configmap
kubectl get configmap/pl-cloud-config -n pl -o yaml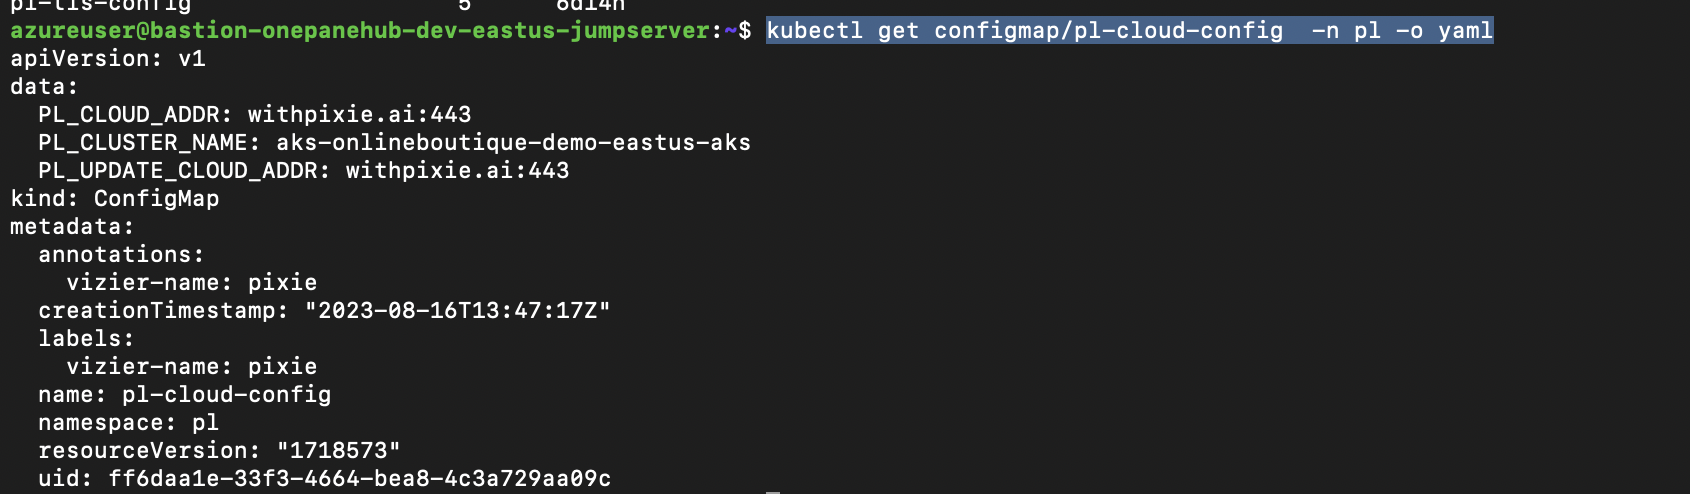
Get the value for PL_CLOUD_ADDR. Ensure that onepane can access the given address.
Store it in a safe place
Step 11: Store Application Information Securely
- Keep the keys, including the cluster id, in a secure location. These details will be used to authenticate and authorize your application to access pixie resources by onepane.
That's it! You've successfully created an API key with the necessary permissions for integrating with pixie resources and incident alerts.